In this modern day world it is essential for almost every business to maintain an online presence and the transport industry is no exception. Whether you are an operator, service provider, vehicle manufacturer or distributor, without a website you will be losing out on sales.
More than this, it is also increasingly important to not only have a website but to have a good one, so how do we achieve this?
Today we will be discussing the first steps of planning your new website and we will go into the specifics of getting it done in the next article of this series.
Step 1 – The domain name
If you already have an existing website then you can skip straight to step 2 since you have already completed this step, if not keep reading.
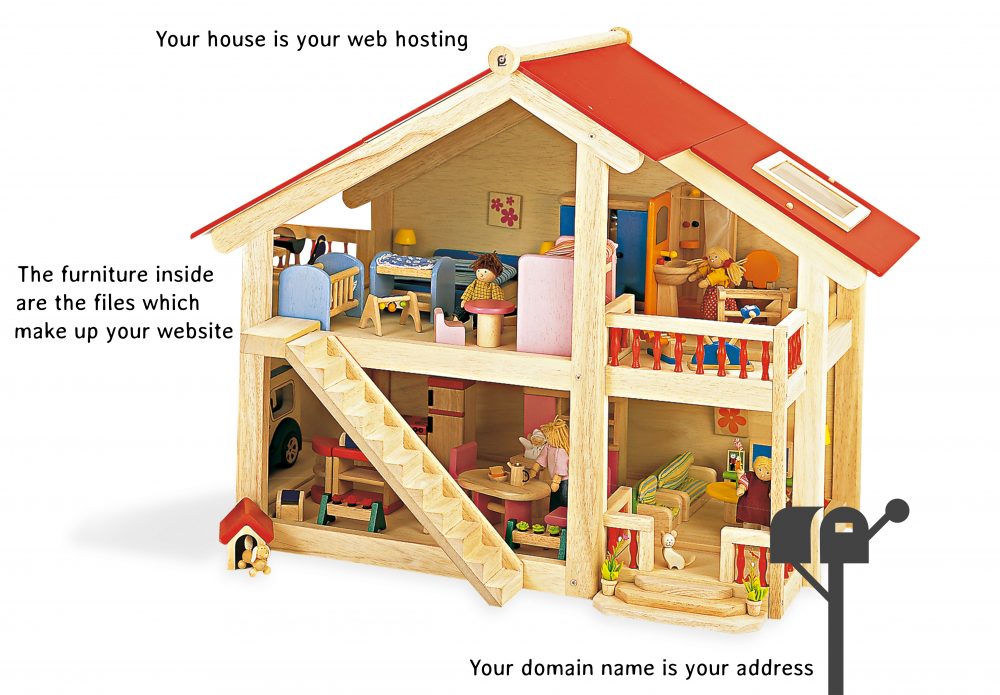
The domain name is the address that connects customers to your website, it will be something like yourcompanyname.com
Many websites addresses start with www. but this is not essential and this is not actually part of your domain name, instead its technical term is a sub-domain.
You will need to purchase your domain name from a registrar such as godaddy.com, namecheap.com or 1and1.com
All domain registrars offer very similar services and roughly similar prices, which one you pick is a matter of personal preference.
A few years ago the major ending for domain names was .com with country specific options (eg. co.uk or com.au) and only a handful of others available. However since 2014 the choices available have exploded to almost 1,000!
You can now choose .coach, .taxi, .car, .cars, .rentals, .voyage and many more!
So which should you choose?
First thing to remember is .com is still king, so if your company name is available with a .com extension, take it. If not then get creative. To check availability go to your preferred domain registrar and search for your desired names until you find an available match.
Avoid anything that will confuse customers trying to remember your name. Do not swap letters for numbers (eg lond0n.com) and avoid hyphens-in-names unless absolutely essential.
Once you have found the right domain name, buy it quick!
You can also but a few similar domains and point them at the same website but don’t go crazy. The benefits of this are low so make sure you keep the costs low too. The main advantage is preventing anyone launching a site later with a similar name to yours, so consider how likely that would be given your name.
My Advice: Choose an easy to remember domain name, relevant to your business, with a .com extension if possible.
Step 2 – Choose your platform
Now you have your domain name sorted, next decision is to choose the platform that your website will be built upon.
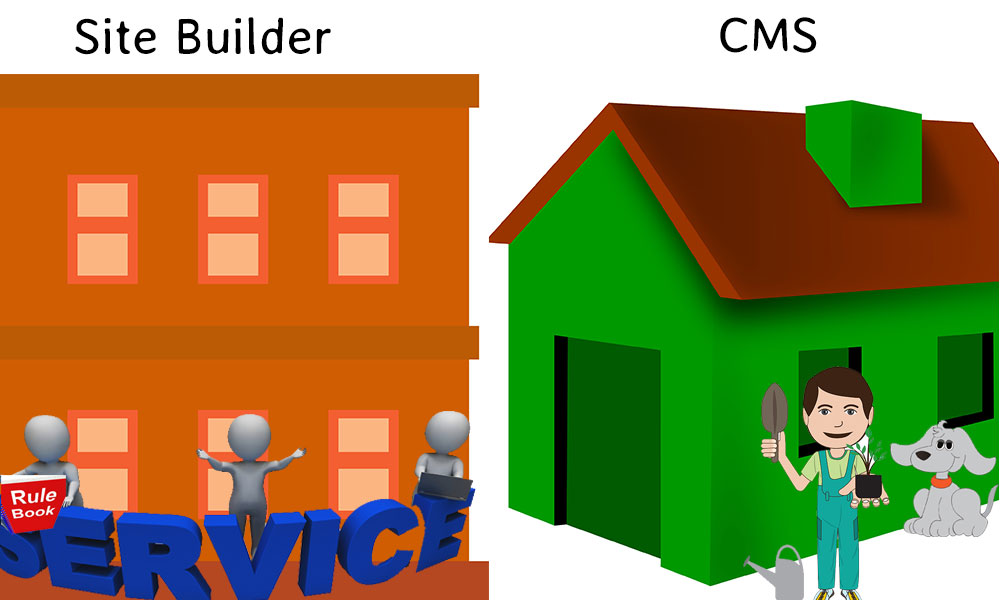
If the domain name is your address then the websites platform is the property that you are renting inside. Some apartment buildings come with a reception to help you out, noisy neighbours and strict rules about what you can and can’t do. Some houses for rent give you more freedom but also more responsibility.
In this example the apartment building would be Site Builders such as wix.com and the house would be a Content Management System (CMS) such as WordPress.

If you want the simplest, cheapest option then a Site Builder will be the way forward. It allows you to build the site yourself using inbuilt templates and features. The last few years have seen vast improvements in the available options, but they all suffer from 2 key disadvantages which are important to understand before you commit.
1) Vendor lock-in. Once you have started a website on a Site Builder you are stuck with this provider, having to build a whole new site from scratch if you ever want to move away. Lack of migration tools and copyright of template files are both an issue here.
2) Non-extendable. While you can always get started, there will often be occasions with a Site Builder where you want to do something their platform does not support. When this happens you are stuck, most of the time with no path forward other than throwing away your site and starting again.
With a CMS there is one key difference to a Site Builder – you have access to every part of the website including the files and the database. You may not ever see them if you use an easy installer that most hosts offer, but the access is there for you or a web developer to use if ever needed.
WordPress is simple enough to use that your Gran could learn in a few hours, yet also powerful enough to support billion dollar companies. It also has a massive community of designers and developers to help you out.
Like Site Builders you can also build an entire site yourself on WordPress – lots of free themes and plugins are available just 1 click away. However if you want a custom professional design, setup correctly for you, that is easy to find.
The last choice available is to have something custom built specifically for your needs. We are not covering this option in this article, since it is a bad choice for anyone in this articles target audience. If you are a large company with an in-house IT team, then this may be a viable option, but you should be talking to your IT manager or CTO instead.
My Advice: Consider a Site Builder if you absolutely have no budget, but think about a CMS such as WordPress if you want to future proof your business.
Step 3 – Hosting
The Domain Name was your address and the Platform is your property type, that leaves the Hosting which is the actual room space or building you are renting. This contains all of the furniture, wallpaper and decorations which are the files that make up the website itself.

Choosing your Platform has already narrowed down your hosting choices.
If you went the Site Builder route then they are your Hosting provider, skip this stage.
If you went with a CMS then you have lots of choices available, one of the advantages of CMS being that you can move websites between any compatible hosting providers.
Here you have a few choices, namely shared hosting, managed hosting and self hosting.
Shared hosting is the entry point for most small businesses, with prices starting at just a few dollars per month. However you get what you pay for and the cheapest options may be on slow, overloaded servers with limited or no support.
Managed hosting providers such as Flywheel and WP engine provide an optimised hosting environment, some easier to use management tools and a high level of support. Where changing config settings and running backups may be your responsibility on a shared host, managed hosting takes care of all of this.
Self hosting comes under the same category of custom built platforms and not a good idea unless you have a full IT team in-house.
My Advice: Decide your budget and get the best hosting you can afford. You wouldn’t want to live inside a paper house and your website would prefer not to as well.
Step 4 – Choose a developer
By now your previous choices may have dictated that the developer is you! If so, go for it and build the best site you can.
If you think your time is better spent elsewhere and have the budget then hiring an expert can be money very well spent. You would look for an interior designer when renovating your house and building a website is just the same.
If you have chosen a specific CMS (I recommend WordPress buts it’s not the only option) then this will help guide you towards developers with the right skill sets and experience. If not, the developers you speak to will help guide you to the right CMS.
If you have limited budget then you will get the best rates hiring from countries with lower costs of living. Eastern Europe and Asia have lots of developers willing to work at very affordable rates, check out freelancer.com or elance.com. Just be careful about communication, issues are amplified when you communicate via email in a foreign language.
For the best results face time can prove important, though it isn’t always essential if communication is good. Hiring locally makes it easier to convey your preferences and goals with the project.
While domain name and hosting have lots of choice, with developers your choice is absolutely massive, there are millions available!
My Advice: Choose someone who you trust, can communicate with and who has a portfolio of past sites that you like.
So now you have a good understanding of the steps needed to start planning a new website, time to get started!


